
I found getting WireGuard to work on OpnSense a “little tricky” to say the least (but far easier than OpenVPN).
The setup I wanted is the classic Road Warrior setup. While away from my office I need my laptop to have access to the office LAN, so I can remote desktop to my work PC and I need all my mobile phone data (iOS) to be routed securely via the office.
I started with the official docs for a Road Warrior Setup. This didn’t work out of the box for me. So I’m detailing my setup just incase it is useful for others.
Enable Wireguard on OpnSense
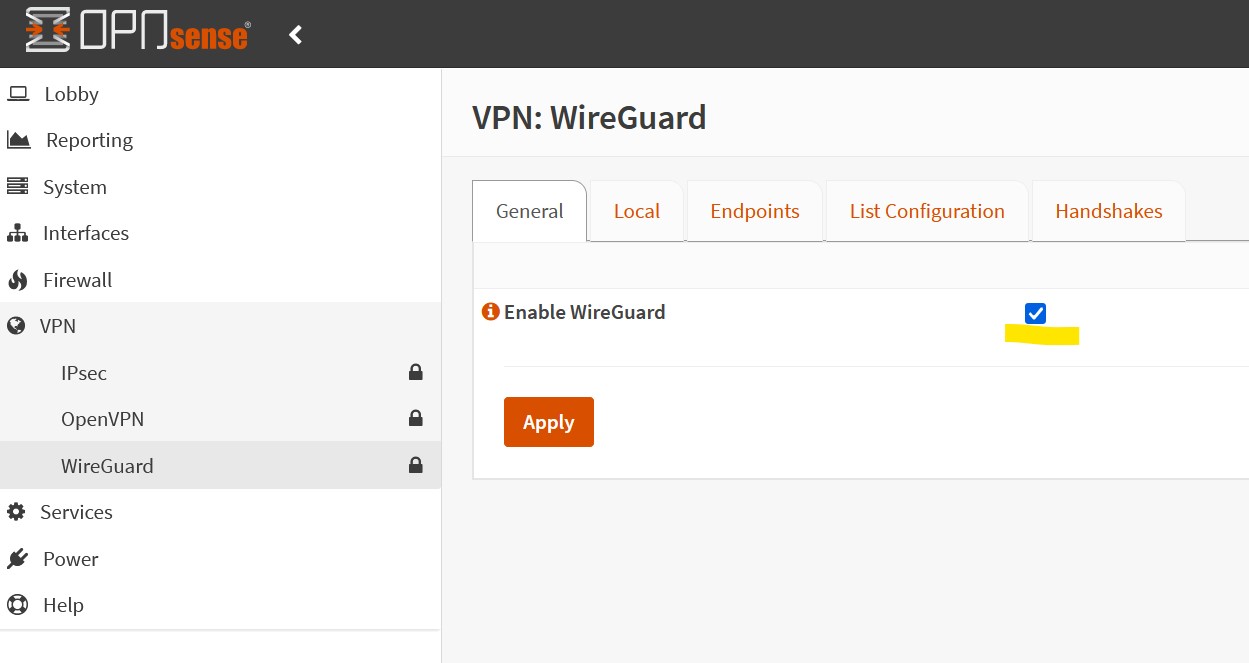
Note: you will need to install the plugin first!
Create a local wireguard instance/configuration
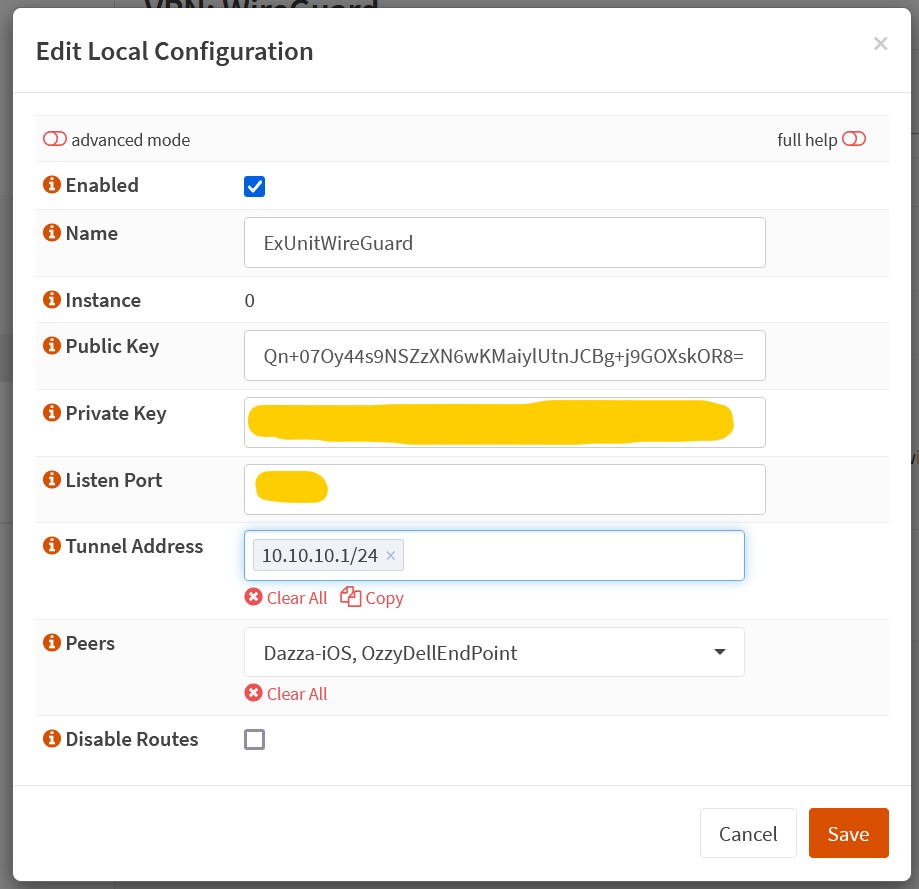
The public and private key can be generated for you. Remember to keep the private key private!. Set a high listen port (51820 or higher).
I decided to go with the private IP range 10.10.10.x for my VPN. So the server (tunnel address) is on 10.10.10.1 and all clients will be on 10.10.10.2, 10.10.10.3, …
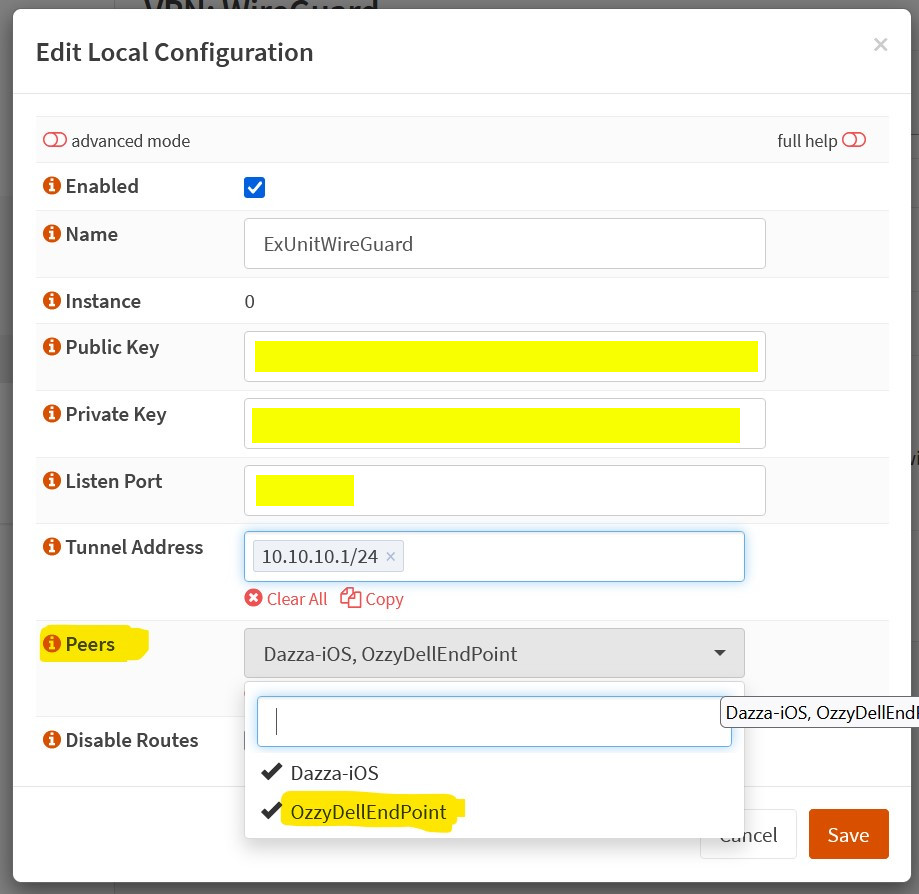
Create a client end point
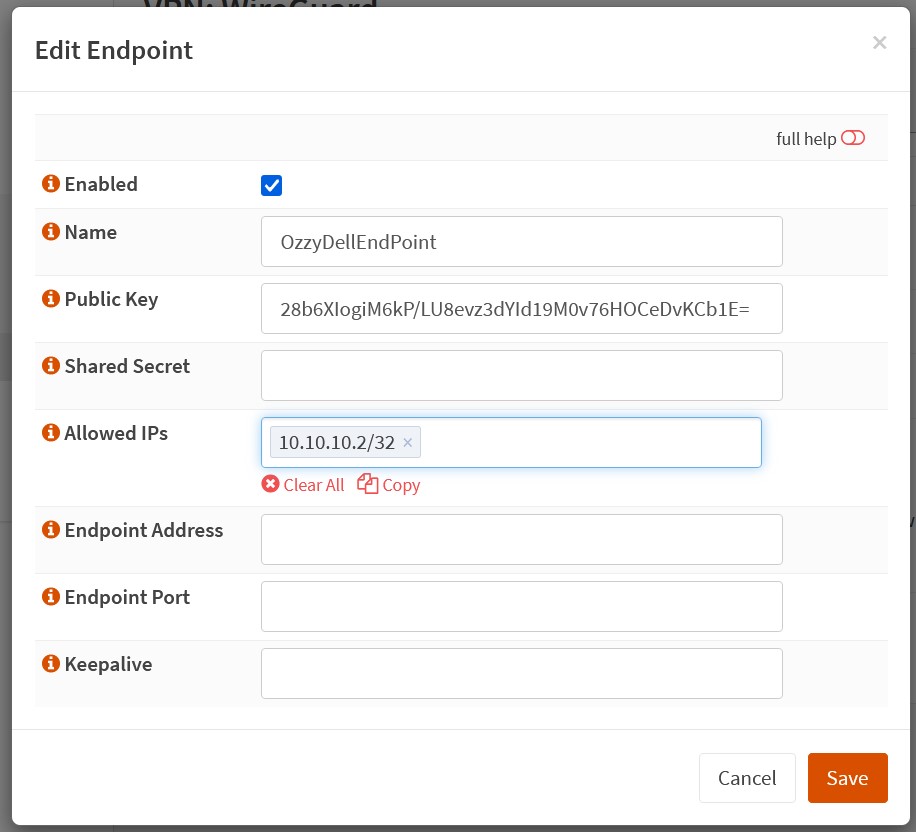
Once you’ve created an end point remember to enable it in the Peers options in the local configuration.
Add OpnSense Fireguard rule
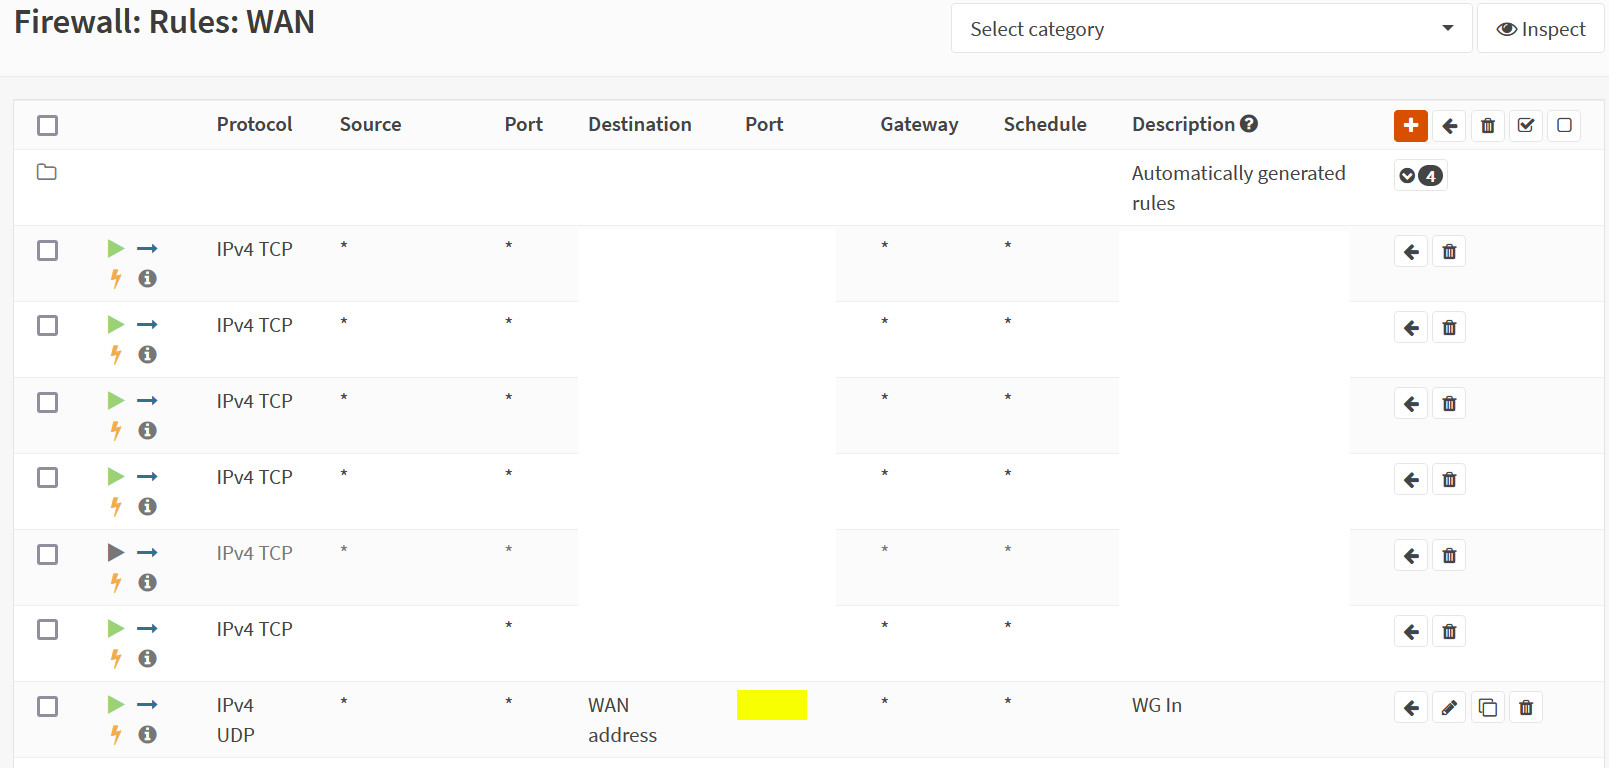
Gotta let those packets in through the WAN. Make sure that the port is the same as the one you set in the WireGuard configuration.
I think WireGuard created rules for me allowing packets to go from the WireGuard interface to any other group. For example from WireGuard (10.10.10.x) to LAN (192.168.1.x).
Client Configuration
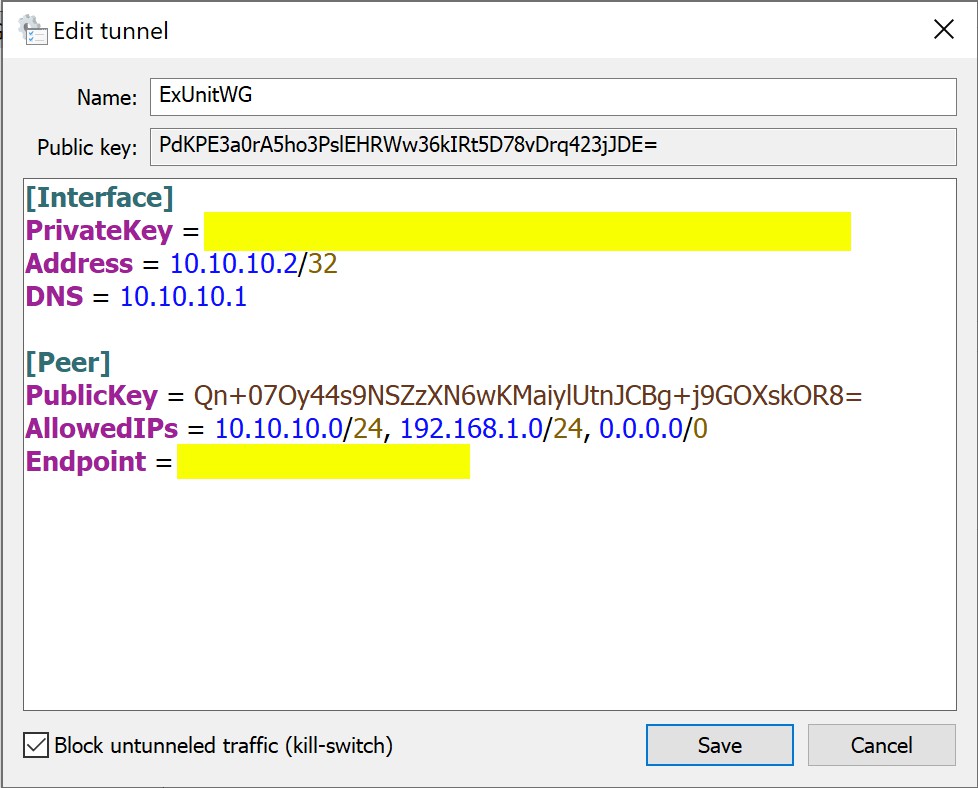
note: endpoint is the IP:PORT pair of the WireGuard router.
I installed the official Windows client. Most of the values in here are just copies of the ones from OpnSense. Crucially you will need to set the private key that you generated on the server in here. I would show you the editable configuration (by clicking the edit button) but when I did that WireGuard stopped responding and now after restarting it the configuration has been deleted! I mostly followed this tutorial to get Windows set up.
The bit in the client configuration that was NOT intuitive for me was the Allowed IPs. The documentation seemed to
imply that setting 0.0.0.0/24 allowed the client to route to any network. This didn’t work for me at all, and I
had to explicitly allow 10.10.10.0/24 for access to the DNS server in this subnet and 192.168.1.0/24 to allow
access to the LAN as well as 0.0.0.0/0 which allowed my clients to access networks outside my LAN but still
via the VPN.
The settings for iOS were similar. I installed the official WireGuard app from the App Store.
What is missing?
For me, the only thing that is missing is some form of two-factor authentication. This isn’t a deal-breaker as you need to log in to my laptop, and you need my face to unlock my phone. However, I feel it would be good especially for my laptop for some form of added authentication to take place before connecting to my VPN.
Hope this helps someone else.
dazza.
Comments